
TAB DEMO -- DO NOT PUBLISH
Sort by:
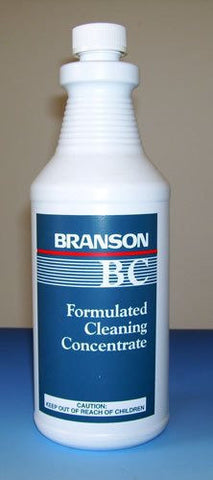
BC Buffing Compound
From $30.00
Sale
Branson 5800 Beaker Cover (4-600ml)
$55.00 $56.38
Branson Ultrasonics has long been recognized as a leader in Ultrasonic Cleaner development, pioneering to use of rugged, powerful 40 kilohertz piezoelectric transducers and sweep frequency. Bransonic baths are used in R&D Laboratories, dental labs, surgical centers, and in a wide variety of light Industrial cleaning applications.
Medical and dental labs: Branson offers safe and consistent cleaning of dental and surgical instruments. Units can also sterilize with the use of appropriate cleaning solutions.
Industrial ultrasonics: Removal of soils, rust, oil, and drawing compounds from machine parts in production. Ultrasonic cleaners are also widely used to return repaired or serviced components to their original pristine condition.
Electronics: Easily remove flux and other soils from circuit boards, quartz crystals, individual electronic components, iPhone and iPad circuit boards, computer parts and more.
Jewelry: Restore the sparkle to watches, bracelets, necklaces, rings, and loose gemstones.
Laboratory: Cleaning glassware, lenses, ceramic, metal components, and instruments.
The Branson Quick Start Guide will get you up and running quickly with your new Bransonic Ultrasonic Bath. For models 3800, 5800, and 8800: For all Models: NOTE: To stop ultrasonics at any time, press the Sonics key ( ). Degassing NOTE: Heat can be activated before or during ultrasonics.
Do this:
Don't do these things:
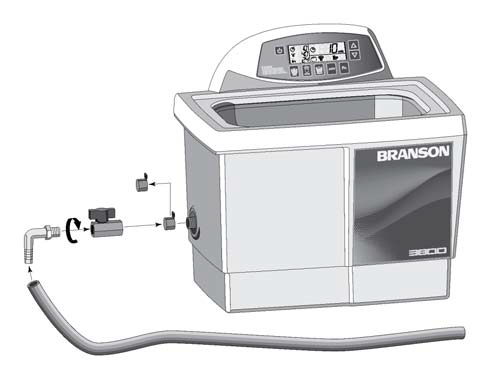
Installation
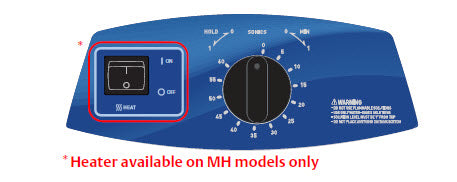
Operating the M/MH Models
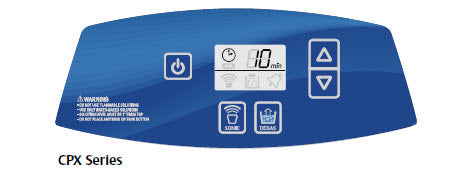
NOTE: For CPX model only. Pressing up key from 99 minutes or down from 1 minutes takes you to Constant Sonics Mode ( and “- -” on the display).
NOTE: To stop degassing at any time, press the Degas key ( ).
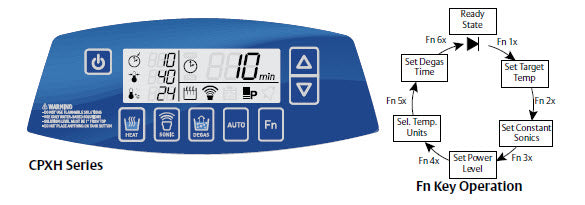
Activating Heat (CPXH Only)
NOTE: To stop heating at any time, press the Heat key ( ).
• Press the Fn key until the Set Temperature icon ( ) flashes.
• Press the up/down keys to alter the setting to the tank temperature you wish to maintain. While blinking, press the Fn key until all the icons stop blinking or wait 15 seconds to return to the ready state.
• Press the HEAT key ( ) once to activate heat. The Heat icon ( ) appears.
This video will walk you through the cutting edge features of Branson's CPX Series cleaners.