
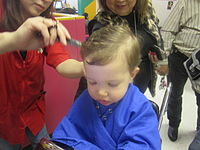
 Do you work in direct contact with your customers? Professionals like beauticians, barbers, stylists, and the like, know how important it is to keep their various tools clean and disinfected.
Just a small nick from a razor or pair of sheers could potentially transfer infection, risking the health of the client, and a lawsuit for the stylist.
You hair styling and grooming tools don’t just have skin cells and oils building up on them – you also have old hairspray, die, mousse and other products accumulating over time.
Keeping beauty tools clean isn’t just important for the professional either, but for your average family as well. If an entire house is using the same set of tools, it becomes doubly important to keep things clean.
You would think with how important it is to keep one’s beauty tools clean, everybody who has anything to do with them would already know how to properly clean them.
This sadly is not the case, especially with the average household. Each beauty tool requires special attention to properly clean, and some even require disinfectants! There is however one way of cleaning beauty tools that most people, even professionals, don’t even know exists. This method can not only clean tools more completely than by hand, but can also clean faster, and clean more tools at once! I’m speaking of course about ultrasonic cleaning.
What Is Ultrasonic Cleaning?
To put it as simply as possible, ultrasonic cleaning uses powerful sound waves to clean objects placed in the tank. You may be thinking to yourself “How on Earth can you clean anything with sound?”. The answer is both surprising, and really cool. Ultrasonic baths use a phenomenon known as “cavitation”.
Cavitation is the rapid creation and destruction of vacuum bubbles within a liquid. Ultrasonics uses high frequency sound waves to both create these microscopic vacuum bubbles, and to force them against the object being cleaned. When these little bubbles hit the surface of an object, in this case a comb ir brush, they collapse. When the bubbles collapses, the surrounding water and cleaning solution blasts into the space the bubble once occupied. This creates and extremely powerful scrubbing action at a microscopic level.
As you can imagine, this high power, microscopic scrubbing will clean anything more deeply and completely than hand scrubbing alone. That’s why ultrasonics are already so popular in the medical and science fields. But how can a beautician or private consumer get in on this cleaning revolution?
Choosing An Ultrasonic Cleaner
Choosing the right ultrasonic cleaner for your specific needs is actually pretty simple. There are but a couple of questions you need to ask yourself, and when you have those answers, you’ll know what to buy! These questions are:
How big are my tools? – The key to this question is how big is the AVERAGE tool you will clean in your sonic unit. If you have one very large pair of sheers, but the rest of your tools are small, there’s no need to purchase an ultrasonic cleaner to fit that one tool. Longer items can have one half cleaned, flipped, then the other cleaned. It may take twice as long, but it beats spending potentially hundreds more on a larger tank.
How many tools do I need to clean at once? – This is the other “tank size” question. The more tools you need to clean at once, the bigger the tank.
Heat or no heat? – HEAT! Since you’re not only cleaning, but sterilizing your tools as well, heat is very important. Heat also allows your ultrasonic cleaner to scrub harder, as it aids in cavitation.
Accessories? – Most professional grade ultrasonic cleaners wont come with an insert basket included, so it’s important to either purchase one, or manufacture one yourself. Remember, when using an ultrasonic bath, the object being cleaned must be held off of the bottom of the tank.
Once you answer these basic questions you will be able to make an informed choice as to which unit is best for you or your business.
Our recommendation for your cleaner:
A great place to start is with the Gemoro 2.6 quart ultrasonic cleaner. It has a generous tank size, digital controls, and a built in heater. It’s sleek, black exterior doesn’t hurt things either.
Cleaning Your Combs, Brushes and Accessories
NOTE: NEVER put flammables (alcohol, etc.) into an ultrasonic bath, as it will create a fire hazard
Once you have chosen your ultrasonic cleaner and cleaning concentrate, it’s time to start cleaning! First, fill the unit to the “fill line” indicated on the inside wall of the tank. Next, lower in your basket or tray, then make sure that the heat in the tank is on. Finally, let your cleaner run empty for a cycle.
This will help it get to temperature faster, as well as forcing trapped gasses out of the tank. Now that your sonic unit is ready to go, here are some quick examples of how to clean certain common beauty tools:
Hair Brushes – First, remove as much hair from the bristles as possible with tweezers, scissors, or what ever else will do the job. Next, lower the brush into the submerged basket in the tank (if the brush is too large to fit completely in the basket, the hand can be left out) and begin the cleaning cycle. Once finished, remove the brush and rinse under clean water. Allow to air dry on a clean, dry cloth.
Combs – Combs clean very much like brushes, but are smaller so more than one comb can easily be cleaned at a time. Simply place the combs in the submerged basket, cycle, remove, and dry just like brushes.
Metal Tools – These include sheers, nail clippers, eyelash curlers, tweezers, electric clipper blades and the like. Place your tools inside the submerged basket, cycle, then remove. Instead of laying them out to dry, hit them with a blow dryer to dry them quickly. NOTE: Ultrasonics are indiscriminate in what they clean, so some metal tools will need to be re-lubricated after cleaning.
Makeup Brushes? – NO! Since many makeup brushes are composed of various delicate materials, such as animal fur and certain glues, it is not recommended that they be cleaned in an ultrasonic cleaner. To clean these, rinse with clean water, then work in a small amount of baby shampoo into the bristles. Rinse again, then disinfect with a mixture of water an vinegar. Rinse a final time, then pat dry with a clean, dry cloth.
Finally, don’t forget your scrunchies and hairbands. Also bobby pins, barrettes and anything else you routinely put in your hair. Keep it clean and keep it safe for you and your family.


Comments 0